Binoculars are expensive, and they can be extremely fragile. Even if you take good care of your binoculars, sometimes they need a little help. If you’ve lost zooming power, or you’re seeing double vision, or perhaps the binoculars fall, and something has broken, here is a guide that will walk you through the steps to get it back up and running.
While this article is written specifically to fix binoculars, it can easily be expanded upon by people with other types of optical devices that need repair. This can include monoculars, spotting scopes, telescopes, and anything else with a lens or glass. Just take it step by step. This will work for most types of binocular repairs—just follow the directions and make sure all parts are accounted for!
Repairing Binoculars
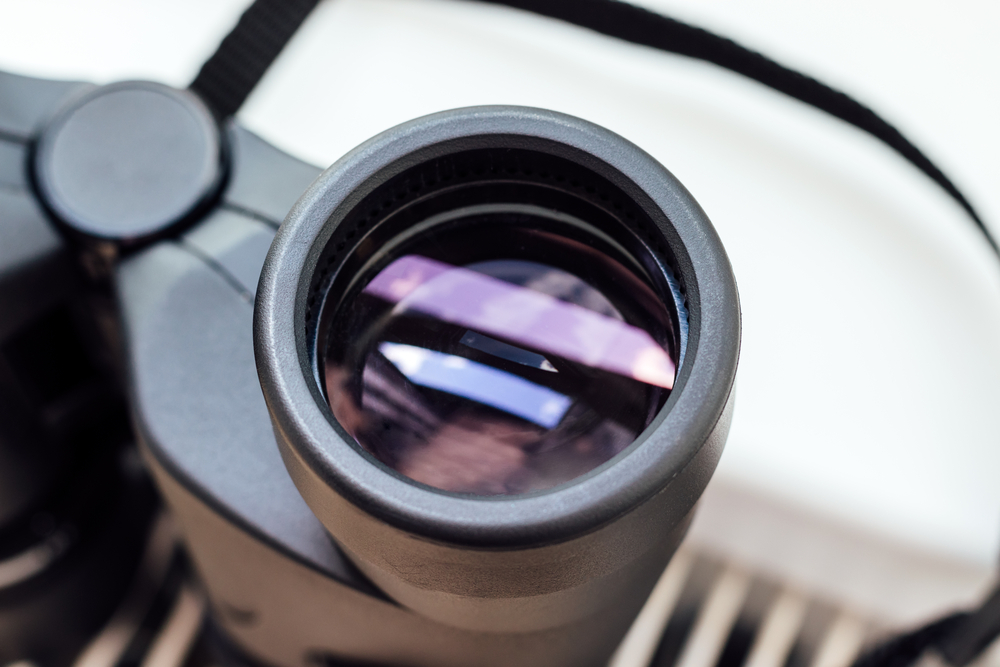
The main goals of this binocular repair guide are to align, focus, and remove dust and debris from the lenses so that they can be used properly again. Also, ensure no scratches or marks remain on the outer casing from where you’re fixing it. With time, these residual marks can blur the image and distort it (you may have to zoom in to see if you have any marking left). Another goal is to clean the front-facing lens surfaces of your binoculars so that images will no longer be distorted – which would look blurry. The instructions for this guide are as follows:
Repair Tools required
If you’re interested in taking on the task of repairing binoculars yourself, make sure you have the below tools before you start:
- The repair manual with instructions on how to take apart your binoculars.
- A precision screwdriver or the smallest screwdriver you can find. The screwdriver is mainly used to remove screws from the outer casing.
- A nut driver to remove the inner casing.
- Some type of dust-repelling wiping cloth. Usually, a microfiber cloth works best. Tissue rolls can leave dust which isn’t ideal.
- Small pliers for removing the rubber eye guards.
- A good soap solution.
- Tape to mark off areas when cleaning/repairing binoculars (optional).
- Magnifying glass (optional)
Preliminary Inspection
After taking off any caps or lids to your binoculars, you can begin repairing them. The first thing to check is whether or not any of the screws holding the two lenses in place have come loose. You can do this by giving each screw a gentle twist, and then make sure that it is still in there securely. If you notice that any of these screws are loose, then tighten them before moving on.
Check The Hinges
The next thing to do is to inspect the hinges on the binoculars. Make sure that they are both still completely intact, as a crack could cause your binoculars to fall apart when opened and closed again. If you notice a crack or become aware of any other damage, consider replacing the hinge entirely instead of just repairing it with tape or glue. If it is a small and unnoticeable crack, you can use a tiny drop of super glue to fix it instead.
Fixing Eye Pieces
If there is any damage to the eye pieces, such as scratches or cracks, then you may be able to repair those by carefully rubbing in some very fine grit sandpaper. This will buff out the scratch until it disappears entirely. You can also use an eyeglass repair kit, which includes polishing cloths and tiny cotton swabs for cleaning purposes.
Cleaning Them
Of course, before doing anything else with your binoculars, you need to make sure that they are properly cleaned, and all dust particles have been removed from them. The best way to do this is to clean them with a small brush and then put them in a jar of clear alcohol – also known as “carmelise”, “polish”, or “wax” to some people. Don’t use any other liquid, such as water, because the alcohol will evaporate quickly and leave you with difficult-to-remove dust particles behind.
Unscrewing Them
Remove the virtually invisible screws with a small screwdriver, and use a magnifying glass if you have one. This will take some time because a precision screwdriver is required to avoid damaging the outer casing. Be careful when removing the two screws that you don’t strip the holes or break any of them. If you break a screw, you’ll have to get more from an optics store or similar repair shop. Always use pliers to hold on to screws that you are removing and if possible, put them in a safe place so they don’t get lost. And make sure to keep track of which screw goes where at all times.
Dealing With The Casing
Once all of the screws are out, carefully pull off and/or pry off parts of the outer casing using pliers if needed. Take note that the parts with screws will be removed last to avoid losing any of them. Also, take note that there are multiple layers of inner casings (there should be at least four layers). You may need to remove all these inner casings if you accidentally broke a screw or don’t know where it went.
Open up your binoculars and remove any lens dust or debris by gently blowing into one eye piece. Close both eyes so air can pass through while blowing inwards.
Polish The Lenses
The next thing that you need to do is polish the lenses of your binoculars using a polishing cloth. You can purchase these online from several different companies that specialise in optical equipment repair. These polishing cloths will have tiny bristles that pick up debris, such as dust and smudges, and then trap them together. It’s important to use the right kind of cloth at the right proportion of polishing agent.
Cleaning The Lenses
Remove any dust or debris from the outside of your objective lenses. Breathe out through one objective lens and gently blow away debris using a soft cleaning cloth or paper towel. It’s important to not allow too much moisture into your binoculars at this stage or you risk making a foggy mess, which will make it harder to complete the process.
While it is possible that something fell into the binoculars, it is most likely that your ocular lenses are dirty and causing distortion or dual images.
If you find any smudges or smears on the lenses, gently blast them with air from a can of compressed air. This will not only remove any particles that might interfere with your focus but will also dry out any moisture in the lenses.
More Cleaning
If you find that your objective lenses still have smudges and smears, you can use a duster to rub them off. Just work over one ocular at a time till you are satisfied with the results. When it comes to correctly focusing your binoculars, allow plenty of space between your eyes (about an inch), so there is room for air to pass through while blowing into each eye piece. If you are having trouble seeing the image, move your head to a different position.
Check The Pins
If both lenses of one diopter adjustment pin are covered with dirt or there is dirt or debris on the pin, use a soft cloth to wipe the lens or lens holder. If you find that the lenses get all cleaned up but still have some smudges and smears on them, try blowing into each ocular lens again.
Reassembly
After cleaning and polishing both lenses, you will want to reassemble your binoculars back together again. This should take less time as you already know what screws to put where.
If you have made any repairs, such as by replacing a broken hinge, then make sure that these are securely applied before attaching the two lenses back together. If you had used super glue to patch the damage, make sure that you use a little bit of carmelise to completely dissolve the glue before reassembling your binoculars.
The final step is to make sure that everything is tight and secure. If you have made any small repairs, such as by replacing a broken hinge, then make sure that these are securely attached before closing shutters and lids on each eye piece. To prevent any dirt from entering your binoculars, make sure that the two lenses are fully closed and then open again after setting them down on a flat surface or in your hand.
Testing
After everything is back together, it’s time to test your binoculars again. Try looking at something at a distance, like a building or a tree about 100 meters away. Ideally, you should place them on a binocular tripod if you have one, and the target should be stable.

Move the focus knob on your binoculars until you get a clear image. If you can’t get a clear image, then try adjusting the centre focusing knob that you had previously cleaned (this is usually near the eyepieces).
Further Troubleshooting Steps
If you tried to repair binoculars to no avail using the steps above, you can also try some of the steps outlined below:
1) Establish your binoculars are functioning properly by focusing at distances of 2 meters, 5 meters, and 10 meters. If your binoculars are not clear enough to focus on anything at these distances, try cleaning the objective lenses. You could also apply grease to the focusing knob screws using cotton buds for better lubrication and precise focusing.
2) If your objective lenses are clear, and you still get blurred images when focusing at these distances, you may need to reset your settings. Do this by adjusting the eye pieces (left and right sides) of the binoculars until they focus properly. When looking through the eyepiece, ensure that they are both adjusted to the same level. If not, adjust them on both sides so they are in line with each other, giving a clear picture without any distortion.
3) Remove any dirt or debris from inside the binocular lenses by blowing into them gently with a can of compressed air. Be careful when doing this. It may damage your lenses.
4) If you are still having trouble focusing, listen to the sound of your binoculars. For example, if you hear a grinding sound, this may mean that something is stuck inside of one of the diopter adjustment pins or in the eyepiece holder.
5) There may be a few options to try if you do not want to get a new set of binoculars and are looking for ways to get them working again. One option would be to try putting a piece of Scotch tape over the focusing ring in an attempt to adjust the focus by moving the eyepiece slowly. This method may not work, but it may still give you a little bit of hope. If you have tried this and still cannot get your binoculars working, I suggest that you take them to your local camera repair shop to see if they can make them work again.
6) If you’re seeing two objects instead of one image when you know there’s only one, it means your binoculars need de-collimation. Ideally, for the best collimation results, you should have a binocular collimator, but if you don’t, a screwdriver can be used instead to undertake a process called conditional alignment.
7) If you have tried the above optical repairs and all of your lenses are still smudged and the ocular (right and left side) seems to have no effect on the image, it is time to call it a day. You should get a new set of binoculars.
8) If you have been using your binoculars in heavy rain or strong winds, rain and debris could hit the lenses directly and start scratching the outer colour coating, damaging them permanently. If this is the case, you will have no luck repairing binoculars and will likely need a new pair. Perhaps consider buying waterproof binoculars next time which should provide better protection from the elements.
Summary
Binoculars are not only used for viewing distant objects, but they are also fun to play with as well. This is especially the case when you can find ways to repair binoculars that quit working properly due to issues such as losing magnification power or seeing blurry images.
Hopefully, this article will give you some ideas on how to repair binoculars at home with some everyday tools and a little patience. I’ve listed the possible problems that faulty binoculars may have and provided you with the steps you can take to fix them without having to replace parts or get a new pair altogether.
Additional Resources
Sources and References
- So What Can Go Wrong With Binoculars? – binocular-repairs.com
- Common Problems in Binoculars’ Lifetime – optics-trade.eu
Sam loves to learn about animals and their habitats. He has been a nature lover from a very young age, and has been writing papers and articles about wildlife for as long as he can remember.
I have a pair of Zhumell sports optics 20×80. The large, 1/2″ thick lens popped out when the tripod fell over on the carpet. Nothing broken, chipped or cracked. Lens came out the front, it should be able to go back in, but how? Zhumell said they couldn’t fix them. I think, with a good suction cup on the lens, it could be put back in and aligned. Thoughts?
It’s worth a try but may not work properly, and if Zhumell are saying there is no repair process for this I would think that not much else can be expected from these optics.