Many people have been fooled into thinking that a bird feeder cannot be hung from windows, or even close to them. This is incredibly untrue because not only can you buy bird feeders that are specially made for windows, nearly all hanging bird feeders can either be attached to a window or very close by.
When hanging a window feeder, you will be able to attract many different birds, including blue jays, tanagers and even finches that you’ll be able to view from the comfort of your home.
So, on that note, whether you’re mounting a small hummingbird feeder or something heavy-duty for a bunch of pigeons, this blog post will teach you how to hang a bird feeder outside a window using different methods, such as with suction cups, brackets, and hooks.
4 Ways To Mount Bird Feeders Near The Window
Hanging a bird feeder on your window can be done in a number of ways.
There are many different types of bird feeders you can purchase and hang outdoors. Some can be placed on a windowsill, others on tree branches, and some on poles or walls.
To start off this process, however, ideally, you should purchase a window feeder. That’s because good window bird feeders are quick and easy to install, and often come with a built-in water tray which eliminates the need for a separate bird bath.
Why are bird baths important, you say? Because bird feeding and offering a fresh supply of water for them to drink and bathe in go hand in hand. Also, window feeders with a built-in water tray will help attract different species that wouldn’t normally visit.
However, do not worry too much if it’s a hanging feeder as opposed to a window bird feeder, because whatever you choose to get, with the right mounting hardware, many different bird feeders can be attached outside or to the window itself.
1. Using Suction Cups
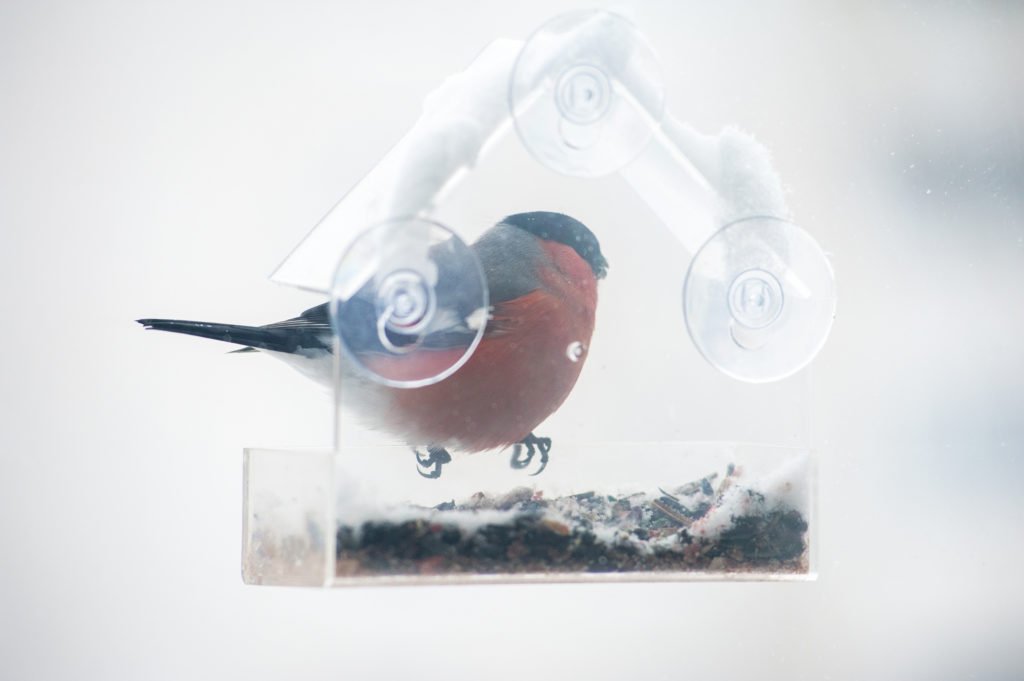
The first method listed will be the one that involves using suction cups and window bird feeders, as it is the easiest and most popular way to hang a bird feeder on your window. If you don’t have a purpose-built window bird feeder, any other type can be mounted near the window, with caution, provided you have the right hanging bracket or hooks.
Once you have the product in hand, check if it comes with suction cups to hold it in place. Window bird feeders will more than likely come with them included. For its intended purpose, these suction cups act as supports and allow you to mount anything onto a glass window or other flat surface, such as a UPVC window frame.
Hanging feeders will be unlikely to come with any type of suction cup fixing.
When purchasing a window feeder, you should find at least two cups in the package. When they are attached to glass, quality suction cups can form a very strong hold that is not easily moved. These cups can work wonders in keeping a window bird feeder in place and preventing it from falling off, especially when you have larger birds like pigeons visiting.
Choose the position
Before you can begin, you first need to decide where exactly you want to place your new window feeder. The best place would be to find a suitable viewing pane facing directly outwards, towards your garden where wild birds visit and where they can see the feeder. If you have trees, bushes, or plants nearby, this will be an incentive for birds to pop by.
For more information, check our top tips on how to attract birds to a window feeder.
Ideally, you want to hang feeders at eye level on the chosen window and relatively high off the ground. Ground floor and first-floor locations are fine, but attracting birds to the ground floor might be somewhat more difficult in homes with a lot of footfall, such as with young children playing in the garden. Also, placing it too low to the ground can attract vermin, ants, insects and squirrels.
Clean the glass
The get the best bond, the exterior of the window where the cups affix must be squeaky clean.
To clean it off, use a damp cloth or sponge and wipe it clean with some glass-cleaning solution, such as liquid or Windowlene equivalent. Windows are rarely clean enough to host suction cups without wipedown.
Attach the suction cup
Once you have decided on an area and cleaned it, simply press one of the suction cups to one of these surfaces and watch as it sticks.
For the best bond, try doing this on a warm day. If the weather is too cold, heat the chosen section of window using a hair dryer for about 45-60 seconds. Once heated, you may need to press down on the cup for about 15 seconds. But do not worry if it is not perfectly stuck right away. It will take some time for the suction cups to adhere perfectly.
Once you have horizontally aligned and fixed all the cups onto the window, you can finally put up your new feeder. As long as you did everything correctly in this process and your suction cups are stuck to your glass surface, then it should be quite simple to position window feeders onto these suction cups.
Test it
Make sure that it does not come off of the cups or tilt sideways, as it may break one or both easily if too much pressure is placed on them. If the suction cups start to come up, simply hold them back down with your hands and try again.
Once you are satisfied with the placement of your feeder and how it is staying in place, you can now add a little bit of bird seed to start off. As long as you have seed in your feeder, the birds will come right to it often enough most likely. Enjoy watching them eat away!
2. Using Suction Hooks
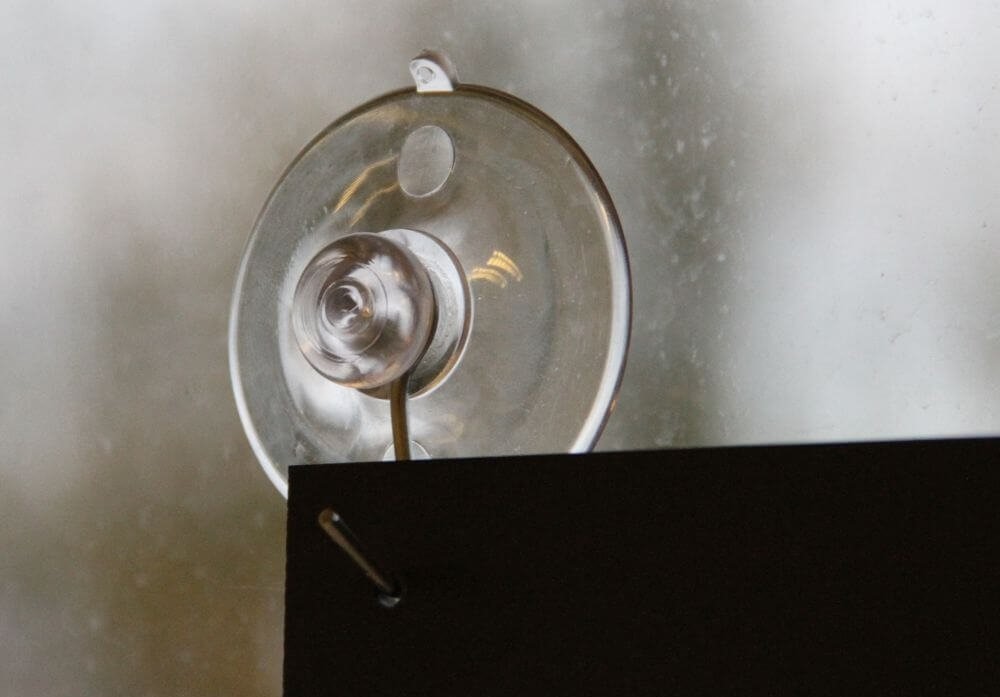
This method for hanging a bird feeder onto a window using suction hooks is quite easy and is applied using the technique mentioned above of utilising suction cups.
Suction hooks are relatively simple to use and involve putting cups with a standard hook shape on the glass of your window and then attaching the bird feeder to the hook, or hooks, depending on the seed feeders you have.
This method isn’t ideal because your bird feeder will most like move around too much and, due to its proximity to the glass (as with the birds too), can scratch or even smash single-glazed windows.
Suction hooks are best suited for fat balls in their original netting, as they will be soft enough not to cause damage.
3. Using Clear Brackets
Brackets (also known as window hangers) are a good way to accommodate multiple birds because they can hold more weight and cater for other bird feeders that would typically be hanging from a tree.
However, many feeders do not come with clear brackets. You will most likely need to buy them separately. This can be done by using your local pet shop, or you can order them off the Internet.
Using a clever, clear plastic bracket stuck onto your window with suction cups will allow you to see through it and minimises viewing obstructions, meaning you get to see more of the backyard birds while they eat.
The first step in hanging your new feeder using a clear bracket is to measure your bird feeder and the length of your bracket. Ideally, the two combined measurements shouldn’t exceed the height of your window.
Most clear brackets come with suction cups as they are made specifically for glass windows. Using the method outlined above, stick the cups and bracket onto the window. If it’s a light bracket, it’s unlikely to move around. However, if the bracket moves around, try placing a tiny drop of cooking oil on the suction cup before affixing it to the window. Once the bracket is secure, the feeder is ready for your bird’s favourite foods.
4. Attaching To The Roof (Near The Window)
Another way to hang a bird feeder outside of your window is to mount it on the roof. This is an ideal solution if you have a flat or pitched roof.
Do not try to attach this method onto a gutter or other area that moves, as the brackets may not work as well with these kinds of surfaces.
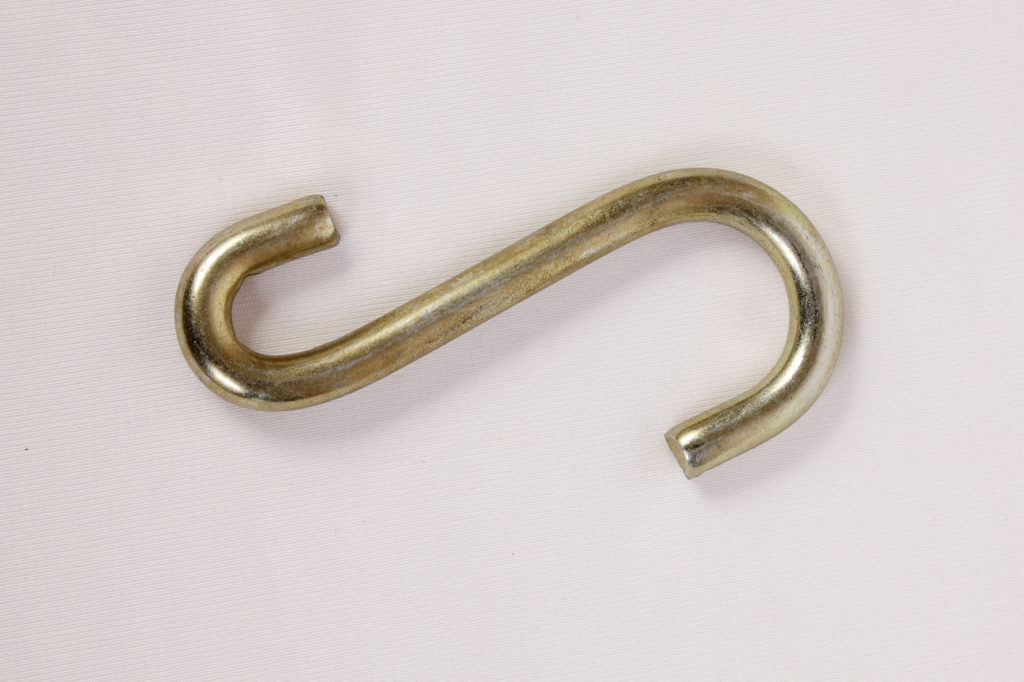
To start this process, begin by measuring the clearance you have for the overhang where you’ll place the hook for hanging your feeder. A roof hanging bird feeder near the window can swing and smash the glass, so it’s important to have either a short chain or a small “S” bracket to affix the feeder to the hook to minimise the swing. Alternatively, ensure adequate clearance to allow for movement of the bird feeder on windy days and also while they’re feasting.
Once you have these measurements and are happy with the clearance, begin attaching the hook to the overhang of the roof. Make sure that it screws in tightly with no movement at all.
Then, affix the chain or “S” hook (whichever you have) onto the newly screwed in roof-hook to bring the feeder lower into view of the window. Attach the bird feeder (to the chain, or directly to the hook) depending on the positioning required for the best view.
The Final Word
Once you have hung a bird feeder by your window, it will be just a matter of time before the birds are pecking away at the food.
The best part about hanging a feeder outside your window is watching the birds have fun while you cook or clean.
The birds will be happy, as will your family and friends when they come over for a visit, especially when they see the busy window feeders come to life with all the different species you’ll hopefully attract.
Additional Resources
Sources and References
- Suction Cup Secrets – nature-anywhere.com
- How To Have Success With Window Feeders – perkypet.com
Sam loves to learn about animals and their habitats. He has been a nature lover from a very young age, and has been writing papers and articles about wildlife for as long as he can remember.