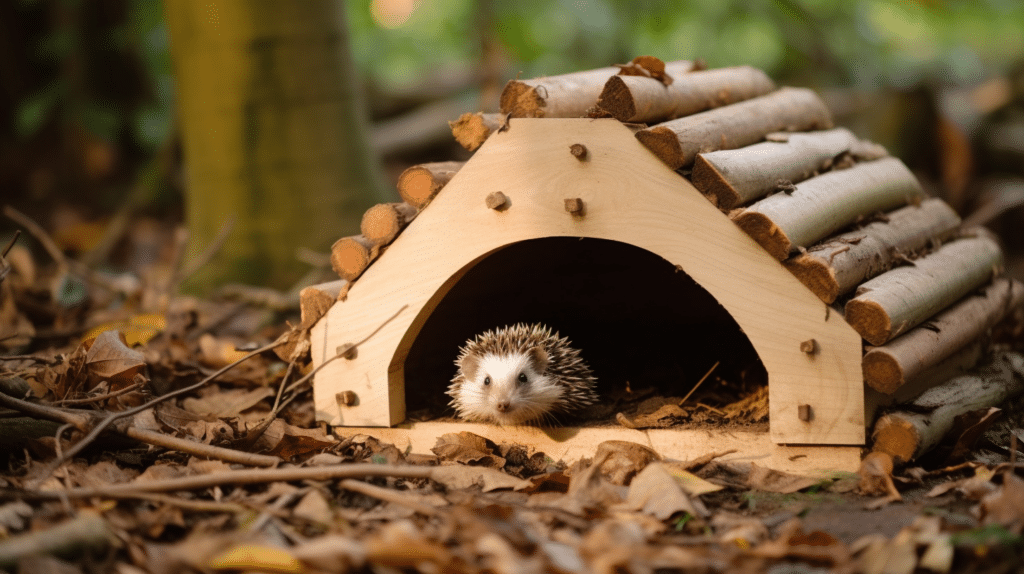
Hedgehogs, those endearing spiky creatures, play a vital role in maintaining garden ecosystems by helping to control pests like slugs and snails. One way to support these charming mammals is by providing them with a safe and cosy shelter, especially during hibernation and nesting. In this comprehensive guide, we’ll walk you through the process of building a hedgehog house that can serve as a welcoming abode for these delightful garden visitors.
Why Build a Hedgehog House
Hedgehogs are a declining species in many parts of the world, including the UK. Habitat loss, urban development, and various hazards have contributed to their declining numbers. Providing a hedgehog house in your garden can offer several benefits:
- Hibernation Shelter: Hedgehogs hibernate during the winter to conserve energy. A well-insulated hedgehog house can help them survive the cold months.
- Nesting Site: Hedgehogs need a safe and secure place to give birth and raise their hoglets. A hedgehog house can provide the ideal spot for nesting.
- Protection from Predators: Hedgehogs face threats from predators such as foxes and badgers. A purpose-built hedgehog house can offer protection against these threats.
- Garden Pest Control: By providing shelter for hedgehogs, you encourage them to stay in your garden, where they can help control common garden pests like slugs and snails.
Now, let’s dive into the step-by-step process of building a hedgehog house.
Materials You’ll Need

Before you begin, gather the necessary materials. You’ll need:
- Plywood or wooden boards: For constructing the walls, floor, and roof.
- Screws or nails: To assemble the house securely.
- Saw: For cutting the wooden pieces to the required dimensions.
- Drill: To create ventilation holes.
- Wood glue: For added stability.
- Hinges and a latch: For the hinged roof, allowing easy access for cleaning or checking on hedgehogs.
- Roofing felt or shingles: To waterproof the roof.
- Insulation material: To keep the interior warm during hibernation.
- Fixing brackets or stakes: To secure the house in your garden.
- Non-toxic wood paint or sealant: To protect the wood and provide a finished look.
- A piece of carpet or hessian sack: For the entrance tunnel.
Step 1: Design Your Hedgehog House
Begin by designing your hedgehog house. The dimensions and design can vary, but some general guidelines should be followed:
- The house should have an entrance tunnel to deter predators and retain warmth.
- Ensure it has a waterproof, sloping roof to prevent rain from entering.
- Add a hinged roof for easy access to the interior.
- Create a snug, insulated interior space for hibernation and nesting.
- Include ventilation holes to prevent condensation.
Step 2: Gather Your Materials
Collect all the materials and tools you’ll need for construction.
Step 3: Cut the Wood
Using a saw, cut the plywood or wooden boards into the required pieces according to your design. You’ll need pieces for the back, front, sides, roof, and floor. Remember to cut an extra piece to create the entrance tunnel.
Step 4: Assemble the Walls
Using screws or nails, assemble the walls of the hedgehog house. Apply wood glue along the edges for added stability. Ensure the entrance tunnel is securely attached to the front piece.
Step 5: Add the Roof
Attach the roof to the house, making sure it slopes downward to allow rainwater to run off. Use hinges and a latch to make the roof easily accessible for cleaning or checking on the hedgehogs.
Step 6: Waterproof the Roof
Cover the roof with roofing felt or shingles to keep it waterproof. This is crucial to protect the interior from rain and moisture.
Step 7: Insulate the Interior
To keep the hedgehog house warm during hibernation, line the interior with insulation material. This can include straw, dry leaves, or purpose-made hedgehog bedding.
Step 8: Create Ventilation Holes
Drill small ventilation holes near the top of the walls to prevent condensation and ensure a well-ventilated interior.
Step 9: Paint or Seal the Exterior
To protect the wood from the elements and provide a finished look, paint or seal the exterior of the hedgehog house with non-toxic wood paint or sealant. Allow it to dry completely before proceeding.
Step 10: Add a Carpet or Hessian Sack
Attach a piece of carpet or hessian sack to the entrance tunnel. This will help keep the interior warm and deter predators.
Step 11: Install the Hedgehog House
Choose a suitable location in your garden to install the hedgehog house. Ensure it’s well-hidden, quiet, and away from areas with heavy human or pet activity. Use fixing brackets or stakes to secure it in place.
Step 12: Maintain and Monitor
Regularly check the hedgehog house for occupancy or signs of hedgehog activity. Hedgehogs may use the house for nesting or hibernation, depending on the season.
Tips for Hedgehog House Success

- Keep it Hidden: Hedgehogs prefer quiet, hidden spots. Place the house near a hedge or shrubs to provide natural camouflage.
- Maintain Cleanliness: Keep the house clean to prevent the buildup of parasites or disease. Remove old nesting material and replenish with fresh bedding.
- Provide Food and Water: Leave out a dish of fresh water and some hedgehog-appropriate food (such as cat or dog food) to attract hedgehogs to your garden.
Conclusion
Building a hedgehog house can be a rewarding DIY project that benefits both these endearing creatures and your garden ecosystem. By providing a safe and comfortable shelter, you’re contributing to the conservation of hedgehogs while also enjoying the advantages of natural pest control in your garden. So, gather your materials, follow the steps outlined in this guide, and create a welcoming abode for hedgehogs to thrive in your garden for generations to come.
Additional Resources

Ash is a contributing author who has been writing about wildlife for as long as he can remember. He has a vast knowledge of many different types of animals, from the tiniest shrews to the great whales that live in the deepest oceans.
